Mongol Part 2
In my last blog, I discussed my plans for collecting a Mongol force for Lion Rampant. In total, I’d need 6 heavy cavalry (Mounted Men At arms with Bows), 12 light cavalry (Mounted Serjeants with bows) and 6 allied cavalry (Expert Mounted Yeomen). The next step was to knuckle down and get some miniatures painted. But what colour to paint them?
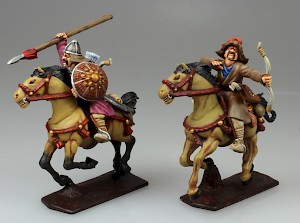
I drew my inspiration from the Fireforge site itself, the Osprey Mongol books and from films such as Mongol (1997). I wanted my horses to have the look of a Mongol pony, with a blakish mane and brown hide. I first started by assembling the horses with Revel Contacta Professional plastic glue. Each horse has 3 variations in left torso and 3 variations in right torso plus three head variations, thus making up to 27 different variants. Once assembled, I sprayed these white for the next stage.
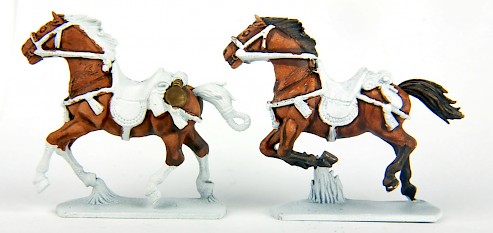
My techinique is to use a series of slightly diluted paints to create washes. Most of the colours I used are from the Coat D’ Arms series, but I’m sure equivalents can be found in other ranges. Firstly I used the Horse Tone Brown (235). Once this had dried, I checked the model and added where needed some of the original colour to the darker recesses if the paint handn’t settled. By adding a touch of ivory to the original colour, you can add highlighs if you wish. I like this wash method, as it is easy to work out which areas should be shaded and which highlightes, as that’s where the paint settles. Next the tail, the bottom of the legs and mane was done in watered down Negro (216). I wanted a black - brown rather than pure black as this would not work well with highlighting.
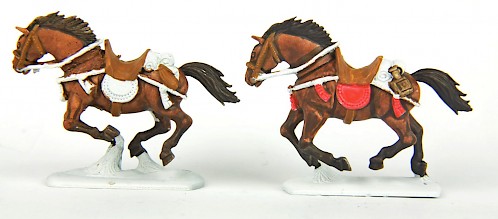
Next I added the saddle. From the pictures, Mongols had different coloured saddles but I opted for a Leather Brown (Barbarian Leather 116). This I also used for the bridle. The tassles and saddle blanket were done in Red (104). I aimed to do each unit with a different colour saddle blanket, so I’d be able to distinguish which horse belonged to which unit quickly on the battlefield.
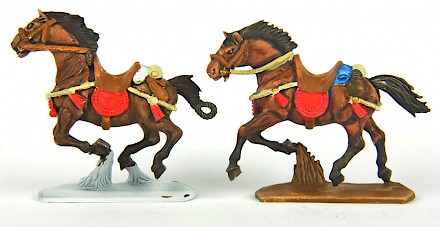
Next I added buff to the horse reins and other tack, plus some brass to the tassle ornaments. I finished off any waterskins in a dark brown and chose some random bright colours for the blanket rolls each horse carried. Finally I painted the base a light earth brown, which will assist blending into the base. From the photos you can see that there’s still a fair bit of white poking through where I’ve missed an edge, but the wash should take care of these easily enough.
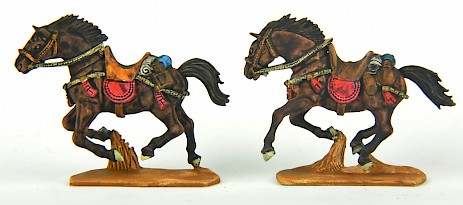
The fianl stage was the wash. I chose a black wash as this seemed to work the best in my tests. I have had some success by using different washes on different parts of the model, but this time I just decided to cover the entire model with the one wash colour. I’m pretty happy with the end result - if needs be I can always go back and highlight different areas. But there again, I’m not aiming to win any awards, I’m just trying to get models which look good enough for the battlefield, so I’m pretty happy. In my next blog I’ll tackle the horsemen and look at the heavy cavalry. Then I should have some finished units to play with!

