Second World War commando raids stand out for their blend of intense tactical decision making and thrilling high-stakes missions behind enemy lines. These missions were typically executed by specially trained units, known for their daring and unconventional tactics, and made up of men chosen for their physical fitness, courage, and resourcefulness.
Commandos and special raiding units conducted a wide range of operations including beach reconnaissance, sabotage, intelligence gathering, and hit-and-run raids. They were known for their ability to strike quickly and then withdraw before the enemy could respond. In essence, our tabletop wargames massively simplify these raids. In reality, these missions involved intricate planning, resource allocation, and precise execution. On the wargames table we very often ignore the first of these factors, go light on the second, and focus heavily on the third, with our tabletop actions dropping us right into the thick of the action, stepping from an aircraft above the drop zone or leaping from the ramp of a landing craft.
On the tabletop, the allure of commando raid games lies in the delicate balance between strategy and action, as players are placed in the shoes of their historical counterparts to overcome obstacles and achieve multiple objectives while contending with limited resources and the ever looming threat of discovery and failure. To dare is to do, as they say, in the smarter parts of north London.
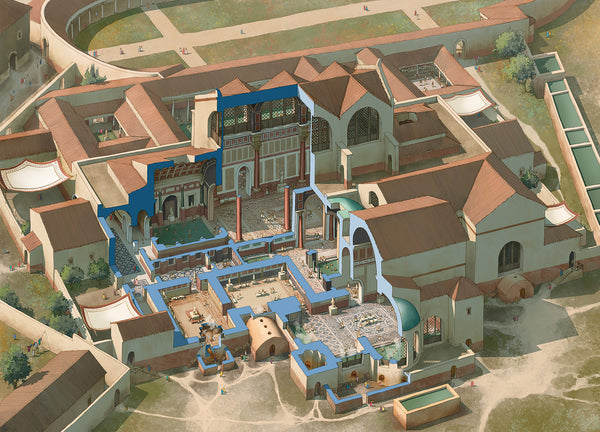
Dockyard games are terrain heavy, but the terrain is not hard to make. A few sheets of foamboard and some grey paint gets you started with a simple yet effective dockyard, easily augmented with a few jetties and other scattered paraphernalia. Lay this over a sea-coloured mat and voila – you have a harbour! This harbour can easily be brought to life with some suitable light industrial buildings. A search on e-bay for some railway terrain can offer some interesting options for industrial bits and pieces that will bring your dockyard to life. These items, such as cranes, storage areas, and supplies, not only make the table look great but they also offer potential objectives for raiders.
Over the past few months and inspired primarily by accounts of the raid on St. Nazaire in May 1942, I have been tinkering with ideas around commando actions, using a dockyard as my main scene of action. In keeping with established wargaming thinking, these have tended to focus primarily on the execution of the raid as this is the easiest focus of player attention. One of the challenges associated with such games is that, very often, the target of the raid is blatantly obvious to both sides. To counter this, in my playtesting I have been playing with a system that incorporates multiple possible targets within a single mission. This approach adds layers of complexity and realism to the game, providing tough choices for the commando player and giving no clues to the player tasked with defence. Of course, this requires a table which contains more than one objective. The good news here is that, for dockyard themed games at least, the potential targets are many.
A few ideas of potential targets to include on your dockyard table include:
The submarine
3D printing means that good model submarines in 28mm are becoming more easily available. A docked submarine or U-boat offers huge potential for dockyard games. Maybe the mission is to capture an Enigma machine from a docked U-boat. Maybe the submarine is docked and waiting to pick up, or drop off, an important person or prisoner who is being handed over at the dock. Perhaps the mission is to free, capture, or possibly even assassinate, the important person. Of course, you can easily turn the submarine into an asset for the raiding force. Perhaps the submarine is the method of escape for the raiders, or maybe even their point of entry. Docked submarines also offer some potential fire support for defenders, as deck guns can be brought into action by skeleton crews.
The admin block
Most military bases have an administration or headquarters block. This building can also contain a possible objective. Perhaps the block contains important files, or blueprints for a new weapon, or maybe just the shipping manifests for enemy shipping lanes. Maybe it contains radio codebooks, or maybe it contains nothing at all except shipping paperwork, plush leather chairs and filing cabinets. The best games will include a mechanism for both searching and finding (or not finding) such precious items.
The factory unit
Warehouses and factory units make potential targets. Perhaps they contain a stockpile of products or supplies vital to the enemy’s war effort. Perhaps they are utilizing a new construction process that needs to be photographed and understood before it is destroyed, or perhaps it is just one in a number of factories that must be put out of action. You need to decide how the plant is to be put out of operation. Perhaps the unit contains some generators or specific plant, or water pumping machinery, each of which can only be destroyed by planting a dedicated charge. Remember that some of these tempting targets may be subterranean, so your game planning would need to consider how they may be accessed. The attacking player may or may not be aware of the access route. Consider also that they may need to link up with an agent to guide them to their objective.
Transport and logistics
Dockyards typically contain cranes and light railways to facilitate the loading and unloading of vessels. These cranes and railways themselves make plausible targets for a raid, with attackers setting charges to make the dockyard inoperable for weeks or months.
Dockyard defences
Dockyards might typically be protected. Defences include anti-aircraft and/or anti shipping positions as well as local defences and possibly even concrete bunkers. Perhaps these are the objective of the raid, which itself may be a precursor of a more substantial raid following close on the back of the one you are gaming. Of course, some of these gun positions may be crewed – and some may not! Don't forget searchlights, always a great target.
The diversionary raid
Some raids may just be a diversion for another attack elsewhere. On a diversionary raid stealth counts for nothing. In this case the player may be given a general brief to cause as much damage as possible to attract the defender’s attention. This typically means the action erupts quickly.
Of course, you can build your dockyard to include whatever targets you want. Be creative. But having many targets gives the attacker some interesting decisions to make. To determine the objective of the raid use a simple system. In my playtesting this means writing each potential objective on a blank playing card and giving the attacking player three cards. The player must accept at least two of the cards. Keeping a few blank cards in the pack keeps the defending player guessing about what the actual target may be. This way the attacker has to formulate a plan to destroy a number of targets, and the defender is left none the wiser about the enemy’s intentions.
Once the attacker has their objectives, allow them to decide on their point of entry. Perhaps they want to drift in by MTB to land directly on the quayside, or maybe they would rather parachute in a few miles inland and arrive on foot – or maybe even by stolen truck. Or perhaps they would like an MTB to cause a distraction offshore whilst they creep in through the backstreets. Again, all these options keep the initiative with the attacker and keep the defender in the dark. If a complicated or phased insertion plan is proposed, be sure to include some form of friction that throws a spanner in the attacker’s plan! Once the insertion method is agreed the attacking player should be asked to select an extraction method. This too should be subject to friction.
The defenders
With the attacking brief established we can turn our attention to the defenders, although in practice both sides can decide their options simultaneously once the table set up is established. Where are they, who are they, and how will they activate? Sentries are an important part of commando games, especially for games set at night, so you need to have a system that allows sentries to be positioned at key locations, and a system that governs their movement and reaction. This is where the ‘target rich’ table provides a challenge for the defending player. A table with many potential objectives will provide the defender with a conundrum. Where should the sentries be deployed?
Consider also where troops may be garrisoned. Is there a group billeted in a house on the table? Do they arrive from off table? What gun and ship crews, if any, might there be on vessels in the harbour? Which defensive posts – if any – are manned? All these give the defending player some interesting options. Our early playtests have allowed the defender up to one squad on the table, up to half of which can be on sentry duty, with the other half billeted in a plausible building somewhere on the table. As the alarm goes up the off-table garrison becomes available, using a random system to activate and deploy.
Alarm system and night firing
In commando games action is generally initiated by the attacker. Games require an alarm system. The general rule in this approach is that the more noise a commando player makes, the more likely the raid is to be discovered, and the more likely the defending garrison is to be put on alert. Commercial rules will include a mechanism for this, but you can create your own. The simplest version of this is to roll a D6 on each commando activation or turn. On a score of five or six add plus one to a start score of zero. This score builds slowly over a number of turns. At the start of the defender phase the defender rolls a D6. If the defender rolls less than the current total score, then the alarm is raised. This should give the commando player a few phases before the alarm goes up. To allow more suspense, the defending player roll can also potentially adjust the score. Thus, if the defender rolls lower than the score then the alarm goes up, but if they roll more than the score then the score goes down by one. Under this simple method the attacker may go for many phases before the balloon goes up. To keep things simple under this system you can assume that the first burst of gunfire, or explosion, will instantly result in the alarm being raised.
Night fighting and visibility are important factors. Visibility is best restricted by applying a visibility range, simply saying that anything outside of twelve inch, for example, is invisible. To allow for muzzle flashes this restriction could be removed for any unit which fired its last phase. To allow for actions that continue through the night, the visibility range can slowly be increased as the game goes on. Again, this mechanism should be readily available in commercial commando rules.
Using motor torpedo boats
Normal armament for the MTBs is one Oerlikon 20mm and a pair of twin Vickers K guns, although the load outs varied dramatically; some might have twin Oerlikons. Treat them as light armoured cars for damage. As they are generally lower than the quayside, they can only engage targets on the edge, or targets on the first floor of buildings and above. They move with a max of 5D6 but may only slow down by losing 1D6 versus the previous move. Thus, if they move with 5D6 one turn then the slowest they can move on the next turn is 4D6. They can accelerate as fast as they like. If using Chain of Command, they activate on a three or four if the Senior Naval Officer is onboard. Commandos can go ashore at normal landing points (steps, jetties) with no penalty, but if they attempt to land elsewhere, a D6 is rolled for each figure. On a six roll again: one to four hauled back onboard and must try again next turn. On a five or six he goes straight to the bottom.
Ideas
These are just ideas to get you started. The more you play, the further your ideas will develop. For me, each playtest brings rule adjustments that may, one day, lead to something which more realistically captures the nuances of such raids. But for now at least, I am keeping things simple just to enjoy the fun of going commando.
The small fishing port of St. Lardaire sits on the western coast of Brittany, just eight miles from the large port of Brest. With offshore shoals and tricky currents the harbour remained a backwater until Napoleonic times, when it provided safe refuge for more than one lone vessel driven onshore by blockading British fleets. St. Lardaire offers a convenient port away from prying eyes. The occupying German forces use it to operate a small flotilla of inshore defence vessels. The small, deep-water harbour also provides a convenient stopping place for U-boats out of La Rochelle and Bordeaux. Abwehr agents embark here, destined for a dangerous drop off somewhere along the coast of Ireland.
Combined Operations HQ has selected St Lardaire as a target for a raid by a small, but heavily armed force. They are to target various facilities at the dockyard. The precise objective(s) will be determined randomly: cards will be made detailing all possible objectives. The attacking player will be dealt three of these cards. They must keep at least two of these targets as their prime objectives. The mission will be a success if they can complete their objectives and complete the safe extraction of the raiding force. Insertion of the force will be by boat. The force will be carried on board two MTBs which, following the insertion, will either remain along shore or move out to sea before returning on the firing of a green flare.
The raiding force is as follows:
Raid Commander: Major Leslie Pheltte-Trowsers, No. 4 Commando
Senior naval officer: Commander Seymour Organs, RNVR
Lt McCoy, RAMC (medic)
Naval vessels: MTB 113 and 144
Team Oboe: MTB 113
Team Popsie: MTB 144
SOE agents
In addition to the main force, the raiders will be accompanied by two SOE agents who will land alongside the commandos, hoping to pass as dockyard workers. This small, unarmed team is tasked specifically with obtaining the payroll records from the factory office before heading inland to join up with French resistance forces. These men operate as a civilian team and are onboard MTB 144.
These men may not be fired upon by defending forces but, if enemy close within four inches of them, they will be stopped and interrogated, using two D6 to test their credentials. On any double thrown, the men are deemed suspicious and instantly arrested. This four inch stop and search range applies by line of sight. The agents may therefore attempt to hide around corners, behind barrels etc.
The defenders
A small garrison of Wehrmacht soldiers provides security at St. Lardaire. The main garrison is located off table in the main town, with a platoon closer by on alarm status. This platoon provides sentries and is the first unit likely to be called upon in the event of any incident. One of the alarm platoon’s squads is on sentry duty, positioned at locations determined by the defending player. Up to half of this squad (a maximum of five) may be deployed as individual sentries. The other four men, along with a section leader, a platoon sergeant, and a three-man MG team are billeted in one of the buildings on table.
In addition, there is always a sentry at the main gate. All sentries have rifles and may be activated as teams. Sentries within four inches will join together as a single team or join any other friendly unit if it comes within four inches. Sentries may move to serve crewed weapons. Any sentry with a twelve inch line of sight to the enemy allows a reroll of the end of turn alarm roll. When activated, any sentry within six inches of a raider or within nine inches of an MTB may fire a shot, raising the alarm.
Once the alarm is raised, the defending player rolls a D6 each turn. On a score of six, an additional section will become available, arriving at the main entrance on the following turn. If the player does not roll a six then no reinforcements arrive, and they must roll again the following turn needing a five or six. If they are unsuccessful, then they will roll again on their next phase, needing a four, five or six. And so on. Once one squad arrives, the defending player will then roll again for further reinforcements using the same mechanism. A run of good dice throws will see a lot of Germans pouring into the dockyard!
Ships crews
All ships in the harbour have a skeleton crew on board, the fighting strength of which is determined when the raiding player comes within six inches of the vessel. Roll a D6:
Charges
Setting charges is performed as an action. Charges can either be on a timer (stating a number of turns or friendly phases before demolition) or may be set off by wire, using a detonator. Players must declare which method they are using when they set the charge. When triggered, roll a D6. On a roll of three or four the charge detonates, partially destroying the target. On a roll of five or six, the charge completely destroys the target. On a roll of two, the charge does not immediately detonate, and must be rolled again in the next turn or friendly phase. On a roll of 1 the charge fails to detonate, and no re-roll is possible. Each demolition team has enough explosives for three charges. If a demolition team has fewer than three men remaining, then the number of charges available to them is equal to the number of men remaining. Defenders may neutralize any charges by spending a turn or activation to do so.
Ending the game
The game concludes either with a safe extraction, or with the capture or annihilation of the raiding force. If using Chain of Command, force morale can be used as normal for the raiders, with the exception that any breaking raiding units will surrender. Force morale is not relevant for the defenders, whose numbers will gradually strengthen to overwhelm any raiders who stay about too long.
A note on table layouts
Dockyard tables are likely to be unique and will depend heavily on what buildings and terrain options you have available. The maps accompanying this article are provided for inspiration and example only; you should feel free to apply artistic license to create a table that works for you! WS&S

All maps © Rocío Espin
This article was featured in Wargames, Soldiers & Strategy Magazine 127. Discover this issue, and others, in our webshop:


